
ASP.NET通过更改Url进行页面传值的实现代码
这篇文章主要介绍了ASP.NET通过更改Url进行页面传值的实现代码,本文通过实例代码给大家介绍的非常详细,对大家的学习或工作具有一定的参考借鉴价值,需要的朋友可以参考下
这里,通过假数据,手动创建的一个类,然后创建的一个集合,放入下拉框,选好值以后,点确定
会在另一个页面产生对应的id
创建一个类:
1 2 3 4 5 6 7 8 9 10 11 12 13 | using System;using System.Collections.Generic;using System.Linq;using System.Web;namespace WebApplication1{ public class Dept { public int Id { get; set; } public string DeptName { get; set; } }} |
一个选择的web窗体
1 2 3 4 5 6 7 8 9 10 11 12 13 14 15 16 17 18 19 20 | <%@ Page Language="C#" AutoEventWireup="true" CodeBehind="Dept.aspx.cs" Inherits="WebApplication1.Dept1" %><!DOCTYPE html><head runat="server"><meta http-equiv="Content-Type" content="text/html; charset=utf-8"/> <title></title></head><body> <form id="form1" runat="server"> <div> <asp:DropDownList ID="DropDownList1" runat="server" AutoPostBack="true"> </asp:DropDownList> </div> <p>><a href="dept_<%=DropDownList1.SelectedValue %>.html" rel="external nofollow" >查询</a></p> </form></body></html> |
选择的web窗体的后台代码
1 2 3 4 5 6 7 8 9 10 11 12 13 14 15 16 17 18 19 20 21 22 23 24 25 26 27 28 29 30 31 32 33 34 35 36 37 | using System;using System.Collections.Generic;using System.Linq;using System.Web;using System.Web.UI;using System.Web.UI.WebControls;namespace WebApplication1{ public partial class Dept1 : System.Web.UI.Page { protected void Page_Load(object sender, EventArgs e) { if (!IsPostBack) { LoadDeptData(); } } private void LoadDeptData() { //手动创建数据 List<Dept> depts = new List<Dept> { new Dept{Id=1,DeptName="小明"}, new Dept{Id=2,DeptName="小王"}, new Dept{Id=3,DeptName="小李"} }; this.DropDownList1.DataSource = depts; //默认显示的值 this.DropDownList1.DataTextField = "DeptName"; this.DropDownList1.DataValueField = "Id"; //保存 this.DropDownList1.DataBind(); } }} |
建一个继承Modules类
1 2 3 4 5 6 7 8 9 10 11 12 13 14 15 16 17 18 19 20 21 22 23 24 25 26 27 28 29 30 31 32 33 34 35 36 37 38 39 40 41 42 43 | using System;using System.Collections.Generic;using System.Linq;using System.Text.RegularExpressions;using System.Web;namespace WebApplication1.Modules{ public class DeptModule : IHttpModule { public void Dispose() { } public void Init(HttpApplication context) { context.BeginRequest += Context_BeginRequest; } private void Context_BeginRequest(object sender, EventArgs e) { //处理请求 //获取请求url HttpApplication application = sender as HttpApplication; //相对路径 string url = application.Request.RawUrl; //一个正则,用来匹配是不是相对应的页面 Regex regex = new Regex(@"dept_(\d+).html"); //正则的匹配后的,微软给铺好的路,正则匹配后的一个数组; GroupCollection groupCollection = regex.Match(url).Groups; //这里取得是数组的第一个值,看看是不是成功匹配了, if (groupCollection[0].Success) { //取到第二个值 var id = groupCollection[1].Value.Trim('_'); //存储id,等用到的时候直接去第二个页面去取值 HttpContext.Current.RewritePath("~/DeptDetail.aspx","","deptid="+id); } } }} |
建完了类,要进入配置文件进行配置
因为我这里是放在一个文件夹下面了,所以配置文件指定type的时候,要加一个文件夹的路径
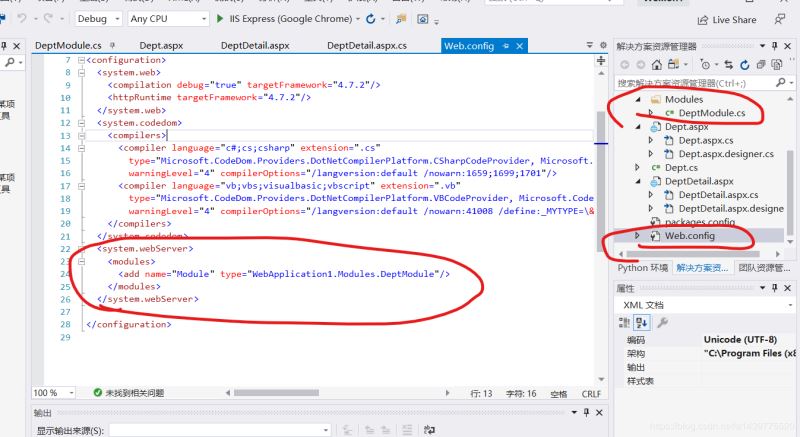
1 2 3 4 5 | <system.webServer><modules> <add name="Module" type="WebApplication1.Modules.DeptModule"/></modules></system.webServer> |
显示的web窗体
1 2 3 4 5 6 7 8 9 10 11 12 13 14 15 16 17 | <%@ Page Language="C#" AutoEventWireup="true" CodeBehind="DeptDetail.aspx.cs" Inherits="WebApplication1.DeptDetail" %><!DOCTYPE html><head runat="server"><meta http-equiv="Content-Type" content="text/html; charset=utf-8"/> <title></title></head><body> <form id="form1" runat="server"> <div> <asp:TextBox ID="TextBox1" runat="server"></asp:TextBox> </div> </form></body></html> |
显示的web窗体的后台代码
1 2 3 4 5 6 7 8 9 10 11 12 13 14 15 16 17 18 19 20 21 | using System;using System.Collections.Generic;using System.Linq;using System.Web;using System.Web.UI;using System.Web.UI.WebControls;namespace WebApplication1{ public partial class DeptDetail : System.Web.UI.Page { protected void Page_Load(object sender, EventArgs e) { if (!IsPostBack) { //直接通过request获取Module存入的id this.TextBox1.Text = $"{Request.QueryString["deptid"]}"; } } }} |
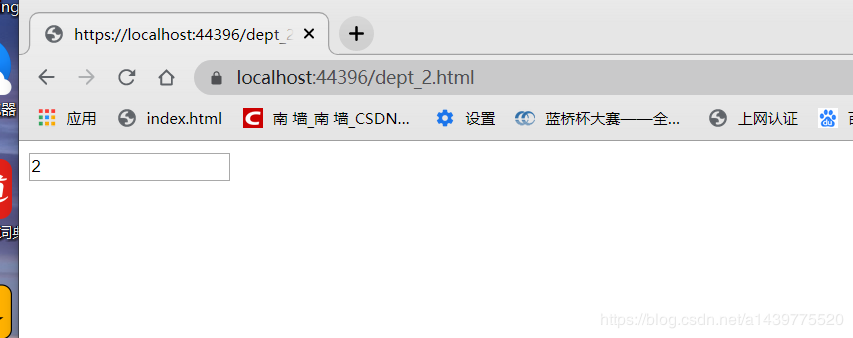
效果图
选择一个后点击查询

地址栏和内容都进行了更改
到此这篇关于ASP.NET通过更改Url进行页面传值的文章就介绍到这了