
SpringCloud学习笔记之SpringCloud搭建父工程的过程图解
SpringCloud是分布式微服务架构的一站式解决方案,十多种微服务架构落地技术的集合体,俗称微服务全家桶,这篇文章主要介绍了SpringCloud学习笔记(一)搭建父工程,需要的朋友可以参考下
SpringCloud是分布式微服务架构的一站式解决方案,十多种微服务架构落地技术的集合体,俗称微服务全家桶
SpringCloud和SpringBoot版本选择
自2019年以后官方建议使用2.0以后的版本
官网地址
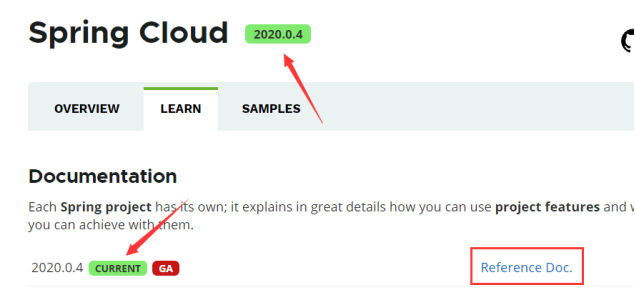
在官网的页首可以看到最新版本以及对应的springboot版本
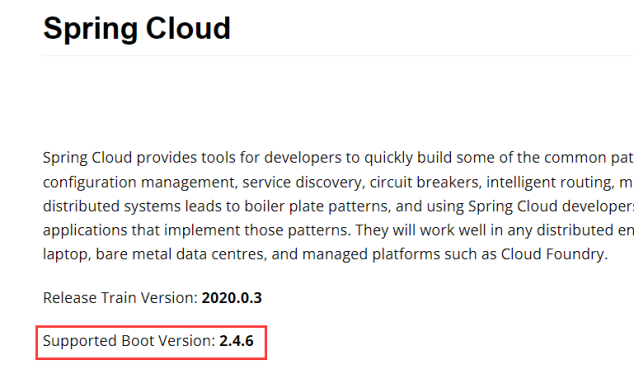
在官网可以看到官方推荐的springcloud与springboot相对应的版本
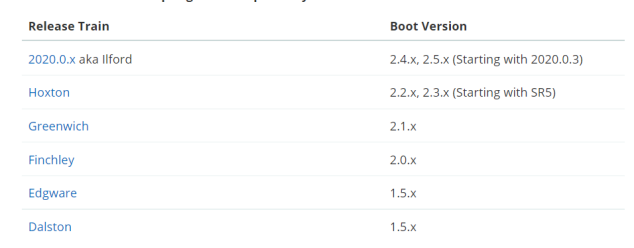
更详细的版本选择
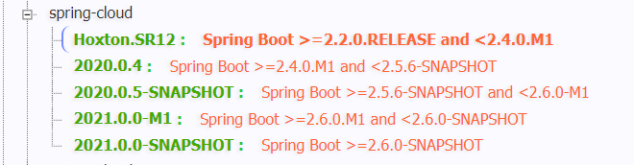
版本info
其中可以看到官方推荐的版本选择
目前选择以下版本
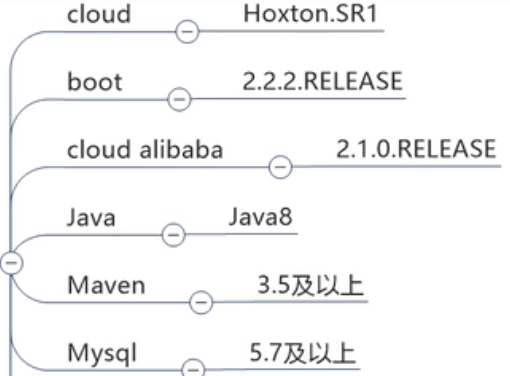
相关技术选型
创建工程
铁则:约定>配置>编码
创建父工程
New Project

新建maven工程
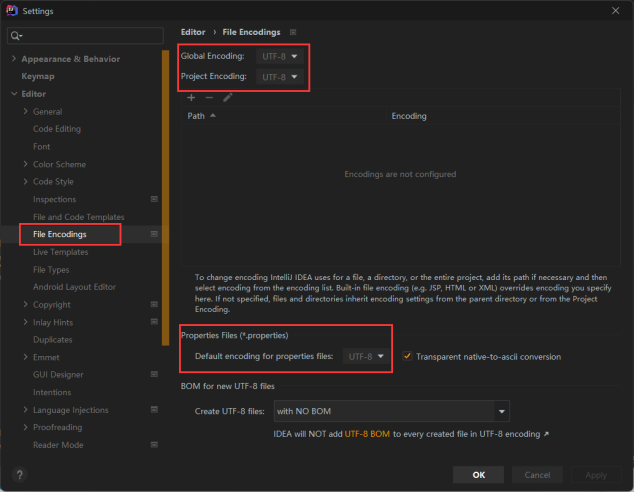
字符编码
在setting中设置
使注解生效
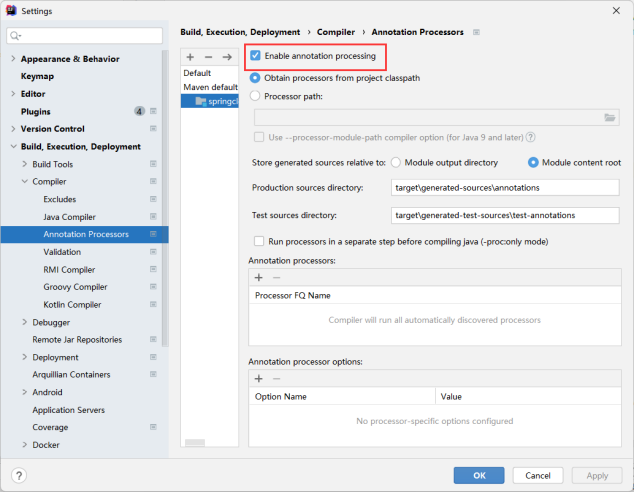
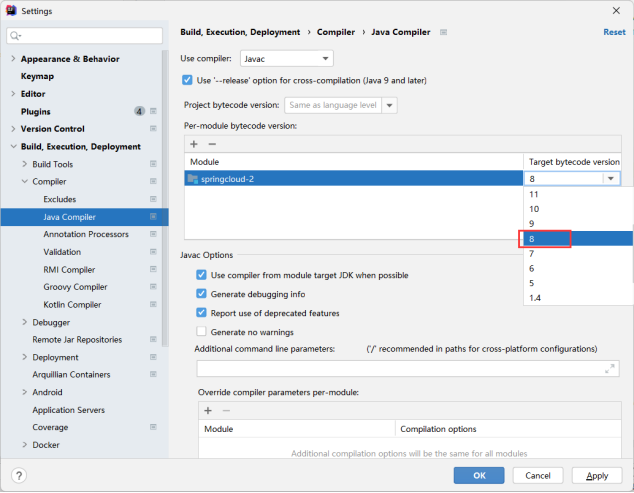
选择java编译版本为java8
配置父工程的pom文件
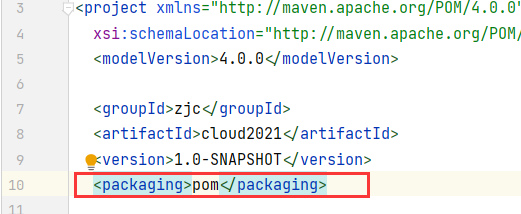
指定打包方式为pom
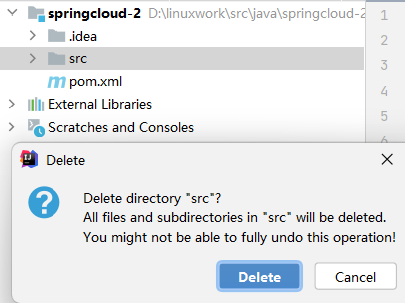
删除自带的src文件夹
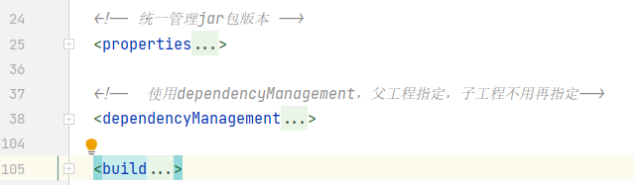
更换pom.xml文件中的部分内容
1 2 3 4 5 6 7 8 9 10 11 12 13 14 15 16 17 18 19 20 21 22 23 24 25 26 27 28 29 30 31 32 33 34 35 36 37 38 39 40 41 42 43 44 45 46 47 48 49 50 51 52 53 54 55 56 57 58 59 60 61 62 63 64 65 66 67 68 69 70 71 72 73 74 75 76 77 78 79 80 81 82 83 84 85 86 87 88 89 90 91 92 93 | <!-- 统一管理jar包版本 --> <properties> <project.build.sourceEncoding>UTF-8</project.build.sourceEncoding> <maven.compiler.source>1.8</maven.compiler.source> <maven.compiler.target>1.8</maven.compiler.target> <junit.version>4.12</junit.version> <log4j.version>1.2.17</log4j.version> <lombok.version>1.16.18</lombok.version> <mysql.version>5.1.47</mysql.version> <druid.version>1.1.16</druid.version> <mybatis.spring.boot.version>1.3.0</mybatis.spring.boot.version> </properties><!-- 使用dependencyManagement,父工程指定,子工程不用再指定--> <dependencyManagement> <dependencies> <dependency> <groupId>org.apache.maven.plugins</groupId> <artifactId>maven-project-info-reports-plugin</artifactId> <version>3.0.0</version> </dependency> <!--spring boot 2.2.2--> <dependency> <groupId>org.springframework.boot</groupId> <artifactId>spring-boot-dependencies</artifactId> <version>2.2.2.RELEASE</version> <type>pom</type> <scope>import</scope> </dependency> <!--spring cloud Hoxton.SR1--> <dependency> <groupId>org.springframework.cloud</groupId> <artifactId>spring-cloud-dependencies</artifactId> <version>Hoxton.SR1</version> <type>pom</type> <scope>import</scope> </dependency> <!--spring cloud 阿里巴巴--> <dependency> <groupId>com.alibaba.cloud</groupId> <artifactId>spring-cloud-alibaba-dependencies</artifactId> <version>2.1.0.RELEASE</version> <type>pom</type> <scope>import</scope> </dependency> <!--mysql--> <dependency> <groupId>mysql</groupId> <artifactId>mysql-connector-java</artifactId> <version>${mysql.version}</version> <scope>runtime</scope> </dependency> <!-- druid--> <dependency> <groupId>com.alibaba</groupId> <artifactId>druid</artifactId> <version>${druid.version}</version> </dependency> <!--mybatis--> <dependency> <groupId>org.mybatis.spring.boot</groupId> <artifactId>mybatis-spring-boot-starter</artifactId> <version>${mybatis.spring.boot.version}</version> </dependency> <!--junit--> <dependency> <groupId>junit</groupId> <artifactId>junit</artifactId> <version>${junit.version}</version> </dependency> <!--log4j--> <dependency> <groupId>log4j</groupId> <artifactId>log4j</artifactId> <version>${log4j.version}</version> </dependency> </dependencies> </dependencyManagement> <build> <plugins> <plugin> <groupId>org.springframework.boot</groupId> <artifactId>spring-boot-maven-plugin</artifactId> <configuration> <fork>true</fork> <addResources>true</addResources> </configuration> </plugin> </plugins> </build> |
更换部分如下
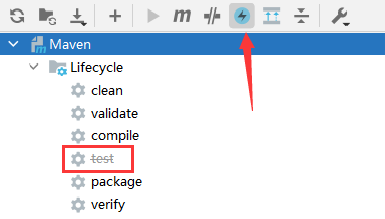
为了防止打包时因为test出错而卡住,需要skip maven生命周期中的test
dependencyManagement 和dependencies的区别
dependencyManagement 通常在父工程中声明,用于声明依赖的version和scope,而不会实际引入包
dependencies通常在子工程中声明,会实际引入包,如果引入了父工程声明过的包,则声明时不再需要指定版本
到此这篇关于SpringCloud学习笔记(一)搭建父工程的文章就介绍到这了