
CentOS配置本地yum源/阿里云yum源/163yuan源并配置yum源的优先级
这篇文章主要介绍了CentOS配置本地yum源/阿里云yum源/163yuan源并配置yum源的优先级,文中通过示例代码介绍的非常详细,对大家的学习或者工作具有一定的参考学习价值,需要的朋友们下面随着小编来一起学习学习吧
一、用Centos镜像搭建本地yum源
由于安装centos后的默认yum源为centos的官方地址,所以在国内使用很慢甚至无法访问,所以一般的做法都是把默认的yum源替换成aliyun的yum源或者163等国内的yum源(下文介绍如何配置)。
但是以上的方法都是需要网络的,当没有网络的时候就无法使用了,所以还有一个常用的方法就是用Centos的iso镜像搭建本地yum源,这样安装软件的速度就会飞快,缺点是可能有些包没有。
1.安装Centos后默认的yum源如下
1 2 3 4 5 6 7 8 9 | [root@kangvcar ~]# ll /etc/yum.repos.d/total 32-rw-r--r--. 1 root root 1664 Dec 9 2015 CentOS-Base.repo-rw-r--r--. 1 root root 1309 Dec 9 2015 CentOS-CR.repo-rw-r--r--. 1 root root 649 Dec 9 2015 CentOS-Debuginfo.repo-rw-r--r--. 1 root root 290 Dec 9 2015 CentOS-fasttrack.repo-rw-r--r--. 1 root root 630 Dec 9 2015 CentOS-Media.repo-rw-r--r--. 1 root root 1331 Dec 9 2015 CentOS-Sources.repo-rw-r--r--. 1 root root 1952 Dec 9 2015 CentOS-Vault.repo |
2.把默认yum源备份(可选)
1 2 | [root@kangvcar ~]# mkdir /opt/centos-yum.bak[root@kangvcar ~]# mv /etc/yum.repos.d/* /opt/centos-yum.bak/ |
3.在虚拟机上挂载CentOS镜像文件
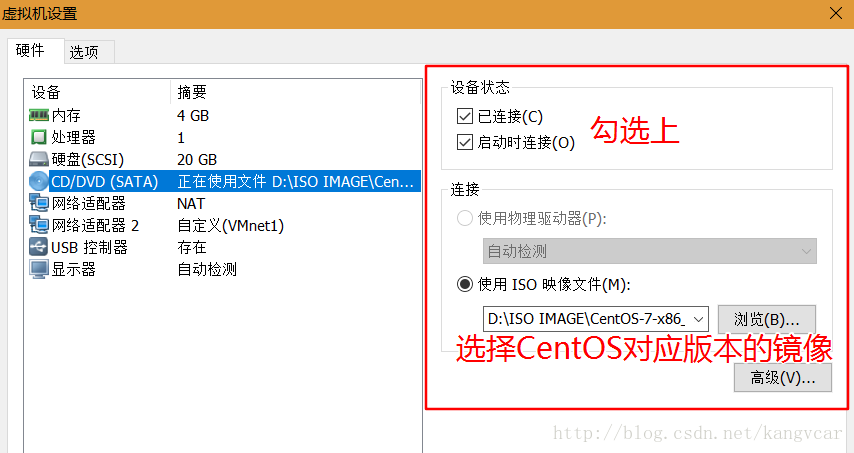
1 2 | [root@kangvcar ~]# mount -t iso9660 /dev/sr0 /opt/centosmount: /dev/sr0 is write-protected, mounting read-only |
4.编写repo文件并指向镜像的挂载目录
1 2 3 4 5 6 | [root@kangvcar ~]# vi /etc/yum.repos.d/local.repo [local]name=localbaseurl=file:///opt/centosenabled=1gpgcheck=0 |
5.清除缓存
1 2 3 4 5 6 7 | [root@kangvcar ~]# yum clean allLoaded plugins: fastestmirrorCleaning repos: localCleaning up everythingCleaning up list of fastest mirrors[root@kangvcar ~]# yum makecache //把yum源缓存到本地,加快软件的搜索好安装速度[root@kangvcar ~]# yum list //列出了3780个包 |
二、把默认的CentOS yum源修改成国内的aliyun yum源
阿里云官方教程:http://mirrors.aliyun.com/help/centos
1.安装Centos后默认的yum源如下
1 2 3 4 5 6 7 8 9 | [root@kangvcar ~]# ll /etc/yum.repos.d/total 32-rw-r--r--. 1 root root 1664 Dec 9 2015 CentOS-Base.repo-rw-r--r--. 1 root root 1309 Dec 9 2015 CentOS-CR.repo-rw-r--r--. 1 root root 649 Dec 9 2015 CentOS-Debuginfo.repo-rw-r--r--. 1 root root 290 Dec 9 2015 CentOS-fasttrack.repo-rw-r--r--. 1 root root 630 Dec 9 2015 CentOS-Media.repo-rw-r--r--. 1 root root 1331 Dec 9 2015 CentOS-Sources.repo-rw-r--r--. 1 root root 1952 Dec 9 2015 CentOS-Vault.repo |
2.把默认yum源备份(可选)
1 2 | [root@kangvcar ~]# mkdir /opt/centos-yum.bak[root@kangvcar ~]# mv /etc/yum.repos.d/* /opt/centos-yum.bak/ |
3.下载aliyun yum源repo文件(对应自己的系统版本下载即可)
1 2 3 4 5 6 7 | #各系统版本repo文件对应的下载操作CentOS 5wget -O /etc/yum.repos.d/CentOS-Base.repo http://mirrors.aliyun.com/repo/Centos-5.repoCentOS 6wget -O /etc/yum.repos.d/CentOS-Base.repo http://mirrors.aliyun.com/repo/Centos-6.repoCentOS 7wget -O /etc/yum.repos.d/CentOS-Base.repo http://mirrors.aliyun.com/repo/Centos-7.repo |
1 2 3 4 5 6 7 8 9 10 11 | [root@kangvcar ~]# cat /etc/redhat-release //查看系统的版本CentOS Linux release 7.2.1511 (Core)[root@kangvcar ~]# wget -O /etc/yum.repos.d/CentOS-Base.repo http://mirrors.aliyun.com/repo/Centos-7.repo--2017-06-20 06:43:08-- http://mirrors.aliyun.com/repo/Centos-7.repoResolving mirrors.aliyun.com (mirrors.aliyun.com)... 112.124.140.210, 115.28.122.210Connecting to mirrors.aliyun.com (mirrors.aliyun.com)|112.124.140.210|:80... connected.HTTP request sent, awaiting response... 200 OKLength: 2573 (2.5K) [application/octet-stream]Saving to: ‘/etc/yum.repos.d/CentOS-Base.repo'100%[=======================================================================================================>] 2,573 --.-K/s in 0s 2017-06-20 06:43:08 (118 MB/s) - ‘/etc/yum.repos.d/CentOS-Base.repo' saved [2573/2573] |
4.清除缓存
1 2 3 4 5 6 7 | [root@kangvcar ~]# yum clean allLoaded plugins: fastestmirrorCleaning repos: base extras updatesCleaning up everythingCleaning up list of fastest mirrors[root@kangvcar ~]# yum makecache //把yum源缓存到本地,加快软件的搜索好安装速度[root@kangvcar ~]# yum list //总共列出了9954个包 |
三、把默认的CentOS yum源修改成国内的163源
163官方教程:http://mirrors.163.com/.help/centos.html
1.安装Centos后默认的yum源如下
1 2 3 4 5 6 7 8 9 | [root@kangvcar ~]# ll /etc/yum.repos.d/total 32-rw-r--r--. 1 root root 1664 Dec 9 2015 CentOS-Base.repo-rw-r--r--. 1 root root 1309 Dec 9 2015 CentOS-CR.repo-rw-r--r--. 1 root root 649 Dec 9 2015 CentOS-Debuginfo.repo-rw-r--r--. 1 root root 290 Dec 9 2015 CentOS-fasttrack.repo-rw-r--r--. 1 root root 630 Dec 9 2015 CentOS-Media.repo-rw-r--r--. 1 root root 1331 Dec 9 2015 CentOS-Sources.repo-rw-r--r--. 1 root root 1952 Dec 9 2015 CentOS-Vault.repo |
2.把默认yum源备份(可选)
1 2 | [root@kangvcar ~]# mkdir /opt/centos-yum.bak[root@kangvcar ~]# mv /etc/yum.repos.d/* /opt/centos-yum.bak/ |
3.下载163 yum源repo文件
1 2 3 4 5 6 7 | #各系统版本repo文件对应的下载操作CentOS 5wget -O /etc/yum.repos.d/CentOS5-Base-163.repo http://mirrors.163.com/.help/CentOS5-Base-163.repoCentOS 6wget -O /etc/yum.repos.d/CentOS6-Base-163.repo http://mirrors.163.com/.help/CentOS6-Base-163.repoCentOS 7wget -O /etc/yum.repos.d/CentOS7-Base-163.repo http://mirrors.163.com/.help/CentOS7-Base-163.repo |
1 2 3 4 5 6 7 8 9 10 11 | [root@kangvcar ~]# cat /etc/redhat-release //查看系统的版本CentOS Linux release 7.2.1511 (Core)[root@kangvcar ~]# wget -O /etc/yum.repos.d/CentOS7-Base-163.repo http://mirrors.163.com/.help/CentOS7-Base-163.repo--2017-06-20 06:29:47-- http://mirrors.163.com/.help/CentOS7-Base-163.repoResolving mirrors.163.com (mirrors.163.com)... 123.58.173.185, 123.58.173.186Connecting to mirrors.163.com (mirrors.163.com)|123.58.173.185|:80... connected.HTTP request sent, awaiting response... 200 OKLength: 1572 (1.5K) [application/octet-stream]Saving to: ‘/etc/yum.repos.d/CentOS7-Base-163.repo'100%[=======================================================================================================>] 1,572 --.-K/s in 0s 2017-06-20 06:29:47 (293 MB/s) - ‘/etc/yum.repos.d/CentOS7-Base-163.repo' saved [1572/1572] |
4.清除缓存
1 2 3 4 5 6 7 | [root@kangvcar ~]# yum clean allLoaded plugins: fastestmirrorCleaning repos: base extras updatesCleaning up everythingCleaning up list of fastest mirrors[root@kangvcar ~]# yum makecache //把yum源缓存到本地,加快软件的搜索好安装速度[root@kangvcar ~]# yum list //总共列出了9951个包 |
四、修改yum源的优先级
ps:当既有本地yum源又有163源的时候,我们在装软件包的时候当然希望先用本地的yum源去安装,本地找不到可用的包时再使用163源去安装软件,这里就涉及到了优先级的问题,yum提供的插件yum-plugin-priorities.noarch可以解决这个问题
1.查看系统是否安装了优先级的插件
1 2 3 4 5 6 7 8 9 10 11 12 | [root@kangvcar ~]# rpm -qa | grep yum-plugin-yum-plugin-fastestmirror-1.1.31-34.el7.noarch //这里看到没有安装yum-plugin-priorities.noarch这个插件[root@kangvcar ~]# yum search yum-plugin-priorities //用search查看是否有此插件可用Loaded plugins: fastestmirrorLoading mirror speeds from cached hostfile* base: mirrors.aliyun.com* extras: mirrors.aliyun.com* updates: mirrors.aliyun.com====================================================== N/S matched: yum-plugin-priorities =======================================================yum-plugin-priorities.noarch : plugin to give priorities to packages from different repos |
2.安装yum-plugin-priorities.noarch插件
1 | [root@kangvcar ~]# yum -y install yum-plugin-priorities.noarch |
3.查看插件是否启用
1 2 3 4 | [root@kangvcar ~]# cat /etc/yum/pluginconf.d/priorities.conf[main]enabled = 1//1为启用;0为禁用 |
4.修改本地yum源优先使用
1 2 3 4 5 6 7 8 9 10 11 12 13 14 | [root@kangvcar ~]# ll /etc/yum.repos.d/total 8-rw-r--r--. 1 root root 2573 May 15 2015 CentOS-Base.repo-rw-r--r--. 1 root root 67 Jun 20 06:04 local.repo//有两个repo文件[root@kangvcar ~]# vi /etc/yum.repos.d/local.repo[local]name=localbaseurl=file:///opt/centosenabled=1gpgcheck=0priority=1//在原基础上加入priority=1 ;数字越小优先级越高//可以继续修改其他源的priority值,经测试仅配置本地源的优先级为priority=1就会优先使用本地源了 |
5.测试
1 2 3 4 5 6 7 8 9 10 11 | 配置优先级前:(使用阿里云yum源)[root@kangvcar ~]# yum -y install vimDependencies Resolved=================================================================================================================================================Package Arch Version Repository Size=================================================================================================================================================Installing:vim-enhanced x86_64 2:7.4.160-1.el7_3.1 updates 1.0 MUpdating for dependencies:vim-common x86_64 2:7.4.160-1.el7_3.1 updates 5.9 M省略··· |
1 2 3 4 5 6 7 8 9 10 11 12 13 14 15 16 17 | 配置优先级后:(使用本地yum源)[root@kangvcar ~]# yum -y install vimDependencies Resolved=================================================================================================================================================Package Arch Version Repository Size=================================================================================================================================================Installing:vim-enhanced x86_64 2:7.4.160-1.el7 local 1.0 MInstalling for dependencies:gpm-libs x86_64 1.20.7-5.el7 local 32 kperl x86_64 4:5.16.3-286.el7 local 8.0 Mperl-Carp noarch 1.26-244.el7 local 19 kperl-Encode x86_64 2.51-7.el7 local 1.5 Mperl-Exporter noarch 5.68-3.el7 local 28 kperl-File-Path noarch 2.09-2.el7 local 26 kperl-File-Temp noarch 0.23.01-3.el7 local 56 k省略··· |
以上就是本文的全部内容,希望对大家的学习有所帮助