
Vue 实例中使用$refs的注意事项
这篇文章主要介绍了Vue 实例中使用$refs的注意事项,具有很好的参考价值,希望对大家有所帮助。一起跟随小编过来看看吧
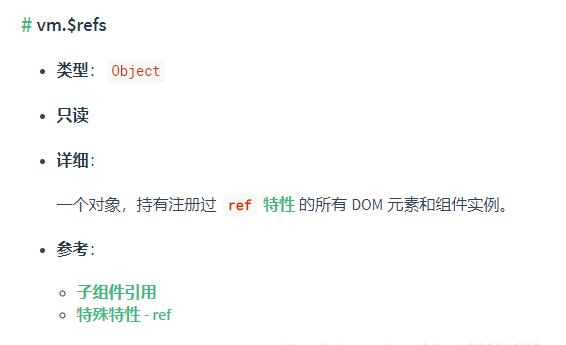
在开发过程中,经常会通过实例的vm.$refs(this.$refs)取得通过ref注册过的组件,并进行相应操作,但存在取不到元素的情况,其根本原因是因为$refs只能取得mounted(渲染)之后的元素。
例如,在这种情况中,若flag从真值切换到假值取不到节点是正常的,因为v-if如果为假值,那么该节点不会被渲染。
但如果从假值切换到真值时,也可能取不到节点,这是因为渲染需要时间,通常可以使用$nextTick()解决。
1 2 3 4 5 6 7 8 9 10 11 12 13 | ...<el-table v-if="flag" ref="table"> <el-table-column prop="prop1"></el-table-column> <el-table-column prop="prop2"></el-table-column></el-table>... export default { methods: { this.$refs.table.XXX() }} |
但存在一个极特殊的情况,第一次页面渲染的时候,$refs也取不到值。这个时候就要考虑v-show进行组件元素的隐藏与展示。
因为v-show是通过css的display:none进行隐藏控制,所以一开始就会渲染,肯定能够取到元素
补充:Vue.js中ref ($refs)用法举例总结及应注意的坑
一、根据官方文档总结的用法:
看Vue.js文档中的ref部分,自己总结了下ref的使用方法以便后面查阅。
1、ref使用在外面的组件上
HTML 部分
1 2 3 4 5 | <div id="ref-outside-component" v-on:click="consoleRef"> <component-father ref="outsideComponentRef"> </component-father> <p>ref在外面的组件上</p></div> |
js部分
1 2 3 4 5 6 7 8 9 10 11 12 13 14 15 | var refoutsidecomponentTem={ template:"<div class='childComp'><h5>我是子组件</h5></div>" }; var refoutsidecomponent=new Vue({ el:"#ref-outside-component", components:{ "component-father":refoutsidecomponentTem }, methods:{ consoleRef:function () { console.log(this); // #ref-outside-component vue实例 console.log(this.$refs.outsideComponentRef); // div.childComp vue实例 } } }); |
2、ref使用在外面的元素上
HTML部分
1 2 3 4 5 6 | <!--ref在外面的元素上--><div id="ref-outside-dom" v-on:click="consoleRef" > <component-father> </component-father> <p ref="outsideDomRef">ref在外面的元素上</p></div> |
JS部分
1 2 3 4 5 6 7 8 9 10 11 12 13 14 15 | var refoutsidedomTem={ template:"<div class='childComp'><h5>我是子组件</h5></div>" }; var refoutsidedom=new Vue({ el:"#ref-outside-dom", components:{ "component-father":refoutsidedomTem }, methods:{ consoleRef:function () { console.log(this); // #ref-outside-dom vue实例 console.log(this.$refs.outsideDomRef); // <p> ref在外面的元素上</p> } } }); |
3、ref使用在里面的元素上---局部注册组件
HTML部分
1 2 3 4 5 6 | <!--ref在里面的元素上--><div id="ref-inside-dom"> <component-father> </component-father> <p>ref在里面的元素上</p></div> |
JS部分
1 2 3 4 5 6 7 8 9 10 11 12 13 14 15 16 17 | var refinsidedomTem={ template:"<div class='childComp' v-on:click='consoleRef'>" + "<h5 ref='insideDomRef'>我是子组件</h5>" + "</div>", methods:{ consoleRef:function () { console.log(this); // div.childComp vue实例 console.log(this.$refs.insideDomRef); // <h5 >我是子组件</h5> } }};var refinsidedom=new Vue({ el:"#ref-inside-dom", components:{ "component-father":refinsidedomTem }}); |
4、ref使用在里面的元素上---全局注册组件
HTML部分
1 2 3 4 | <!--ref在里面的元素上--全局注册--><div id="ref-inside-dom-all"> <ref-inside-dom-quanjv></ref-inside-dom-quanjv></div> |
JS部分
1 2 3 4 5 6 7 8 9 10 11 12 13 14 15 | Vue.component("ref-inside-dom-quanjv",{ template:"<div class='insideFather'> " + "<input type='text' ref='insideDomRefAll' v-on:input='showinsideDomRef'>" + " <p>ref在里面的元素上--全局注册 </p> " + "</div>", methods:{ showinsideDomRef:function () { console.log(this); //这里的this其实还是div.insideFather console.log(this.$refs.insideDomRefAll); // <input type="text"> } }});var refinsidedomall=new Vue({ el:"#ref-inside-dom-all"}); |
二、应注意的坑
1、如果通过v-for 遍历想加不同的ref时记得加 :号,即 :ref =某变量 ;
这点和其他属性一样,如果是固定值就不需要加 :号,如果是变量记得加 :号

2、通过 :ref =某变量 添加ref(即加了:号) ,如果想获取该ref时需要加 [0],如this.$refs[refsArrayItem] [0];如果不是:ref =某变量的方式而是 ref =某字符串时则不需要加,如this.$refs[refsArrayItem]

加和不加[0]的区别--未展开

加和不加[0]的区别--展开了
3、想在element ui 对话框打开后取dom时,应该使用$nextTick,而不是直接使用this.$refs. imgLocal2:
1 2 3 4 5 6 7 | console.log('this.$refs.imgLocal2外面', this.$refs.imgLocal2);setTimeout(() => { console.log('this.$refs.imgLocal2 setTimeout', this.$refs.imgLocal2);}, 500); // 不推荐this.$nextTick(() => { console.log('this.$refs.imgLocal2 $nextTick', this.$refs.imgLocal2);}); |

以上为个人经验,希望能给大家一个参考